Sunday 27 October 2013

A Science Affair

In my day job, I'm a scientist and the scientific world around me always seems to skulk its way into my bank of inspiration!! Believe it or not there are many dazzling phenomena in the mundane daily lab life to inspire beautiful polymer clay pieces. The first piece I attempted was a variation on a protein crystal structure. Incorporating extruded brightly coloured clay to represent the common alpha helix and beta sheet forms.


Then I found my flower petal canes turning into E.coli with stripey flagella on this pendant!


My backdrop for this pendant looked so much like a fingerprint after I textured it that I went with a forensic science theme, with a trail of blood for the forensic scientists to follow and blood drops to be analysed.


Sunday 7 July 2013

New Facebook Page


I've just launched my new facebook page:
Inishkea Facebook Page
Make sure you pop by and like my page to get all the updates on new blogs, new pieces and news on markets and stockists.

I also created some funky posters to display on my market stall to showcase Inishkea.


Wednesday 3 July 2013

Shifty polymer - playing with Mica Shift effects


Mica shift is a technique used in polymer clay work requiring metallic or pearl clay. These clays contain mica particles, which can be aligned by passing your clay through your pasta machine repeatedly in the same direction. An impression can then be left in the clay with a rubber stamp or the like. Using a fine, flat tissue blade to remove the uppermost layer of clay miraculously leaves you with a smooth flat piece of clay with a seemingly 3-dimensional pattern in it.

I recently discovered the fantastic tutorials over at CraftArtEdu. And after watching Carol Blackburn's mica clay tutorial (http://craftartedu.com/polymer-clay/carol-blackburn-free-basic-introduction-to-mica-clay), I played around with her idea to try two very different coloured mica clays with the mica shift technique. I used my bronze and pearl (with a bit of white mixed through it) Kato clays and a couple of different texture sheets and rubber stamps. The bangle below was made by alternating panels from different mica shift sheets on a base of marbled clay.


Thursday 27 June 2013

Hanging aROUND! Making a round pendant...


Here is my photo diary of how I made a round pendant.

I formed some scrap clay into the rough round shape I wanted the pendant to be by warming it and pressing against my tile work surface.

I used 2 sheets of this purple clay rolled out on a fairly thin setting on my pasta machine.
Onto one of the sheets I laid thin slices of an extruded cane I had made and smoothed with an acrylic rod to make a veneer.

The other sheet of purple clay was used to cover both top and bottom of my rounded scrap clay. 

I used circular cutters to cut out a piece of the smoothed cane veneer sheet and also another smaller piece of the plain purple sheet.
I laid these on top of the pendant, off-centre.

Round pendant ready to bake.

I completed the pendant by wet sanding with 3 different grits of sandpaper then buffing to a shine.
I attached a silver bail to the back for hanging from a chain.


Tuesday 25 June 2013

Poly Pipe Cane Tutorial


I saw a truck, the other day, carrying a massive load of poly pipe all stacked up on the back. It inspired me to get creative with my extruder. Here's a tutorial for my new Poly Pipe cane, instructions are in the captions! I've tried this with a few colour combos (as shown in the pictures at the end) and it's really effective.

I used Kato polyclay in black and white. You can use any colours as long as you get a nice contrast.
You will need an extruder with a few different diameter circle discs, a pasta machine, a ruler, a blade and a good clean work surface, I used a tile.

Condition your clay and then roll it out on a medium setting on your pasta machine. Lay the clay flat on your  work surface.

Cut out circles of clay using the extruder barrel.


Lay the circles of clay on top of each other as shown above.
Pattern used in this example: 2w 1b 1w 1b 2w 2b 1w 1b 1w 1b 2w 1b 1w 2b 1w 1b.
Or alternate pattern: 2b 1w 1b 1w 2b 2w 1b 1w 1b 1w 2b 1w 1b 2w 1b 1w.

Neaten stacks and reduce slightly to ensure they can fir inside the extruder barrel.

Extrude your clay stacks into snakes using 4 different sized extruder discs. Make 2 snakes at the 3 larger sizes and 1 snake at the smallest size.

Cut all snakes into 8cm segments.

Stack the clay segments randomly, forming a cane. Fill gaps with the smaller diameter segments.

Voila! Your Poly Pipe cane :)

Poly Pipe cane pendant

A different version of the Poly Pipe cane

Poly Pipe cane used for flower petals

Poly Pipe cane pendant


Tuesday 18 June 2013

Burning up


Ever wonder what burnt polymer clay looks like? Wonder no more...I chose the wrong setting on my little clay oven and here's the spectacular result:
Before baking

After 'baking'!

Thursday 13 June 2013

Bettina Welker's Pixelated Retro Blend Cane

I saw the fabulous Pixelated Retro Blend Cane on polymer clay daily a couple of weeks ago and just HAD to give this a try! Lucky for me Bettina Welker has very generously published a tutorial on her website...yay!


I just love the effects you can achieve with an extruder and this cane really shows off some of that potential. My first play was following Bettina's tutorial as closely as possible. I didn't end up making a very large cane so only made two pieces from it and a few beads.


I varied the technique slightly by using a square extruder disc and I loved the effect, the cane is lovely. Thanks Bettina!!


Sunday 9 June 2013

New Beginnings...

Well, it's quite hard to believe I put down my clay over a year ago. The last year has been...full on, to say the least. My husband, Todd and I decided to renovate and sell our house, which took about eight months of hard work, a lot of money and all our spare time to bring to fruition. The end of the year saw Todd and I living in our new house, with a new car and a brand new kelpie puppy, River. With an overseas trip planned to go see my mum and dad in Scotland. When we decide to change things, apparently we go the whole hog!! Needless to say, as you can see from my lack of blogging, polymer clay has had to take a back seat for a while.

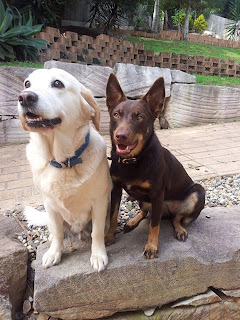
Chloe and our new fur baby, River.
I named my polymer clay collection of work Inishkea, for the island where my nana was born. My beautiful nana, Sabina, lost her battle with Alzheimer's disease in August. It was hard on my family to lose someone so special to such a devastating illness, to see her fade away in mind and body. I wrote a poem for my nana, which my dad made into a slide show:


In March, we took a road trip with my parents through Ireland and were lucky enough to find someone who could take us out in his boat to visit Inishkea. An amazing experience I was so happy to share with my husband, my mum and especially my dad. We also had David, owner of the boat 'Wave Sweeper 2' and his father-in-law, Paddy Reilly (his father had grown up on the Islands) - who were both fantastic and had lots to tell us about the Inishkea islands.

The Wave Sweeper 2; Paddy, Me, Todd, Dad and Mum.
On Inishkea, the colours really struck me. Soft green grass, pale yellow sand, the grey of the stone houses, the orange rust of the hinges and tin roofs, the brown and white pebbles, the aqua blue of the water and the deep ominous blue of the imposing Achill island nearby. I've tried to capture these colours in my first Inishkea-inspired polymer work - my "Colours of Inishkea" cane.

Inishkea - looking to Achill island.

Inishkea.
Inishkea.
Ruined roof on Inishkea.
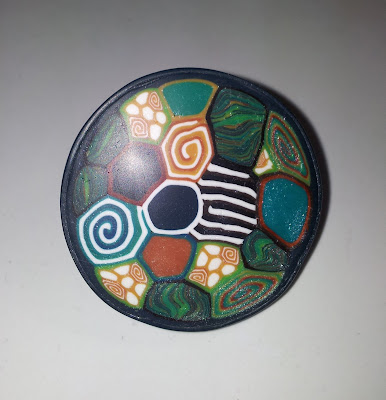
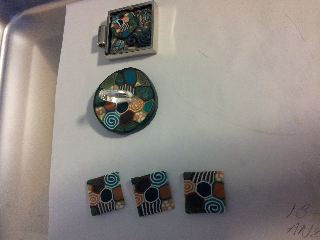
Colours of Inishkea - Ring.
I've returned to my clay table, after a year of so much change, with a renewed passion and buzz about my work! I hope Nana is proud of what I'm doing.